

You should take immediate action if your mouse is moving by itself. If ignored, some of the problems causing the motion may eventually worsen.
The main method for determining which issue is causing your problems is trial and error. When possible, I always begin troubleshooting by rapidly cleaning components. In this manner, even if it fails, I can still accomplish something constructive that improves my setup.
Why the Mouse is Moving on Its Own?
The mouse may be traveling on its own for a few different reasons.
- Debris inside or on the mouse can interfere with its functionality.
- The surface that you are using it on may cause problems.
- Mouse malfunctions may be caused by issues with the computer’s mouse settings.
- It could be necessary to get a new mouse.
How to Fix Mouse is Moving On Its Own?
When your mouse starts to move by itself, review all of your settings and address a few possible issues. This is probably the best technique to tackle the problem.
1. Maintenance of Mouse
Prior to beginning troubleshooting, take a few actions.
- Restart the computer, particularly if this is the first time the issue has arisen. Restarting can sometimes improve everything with little work.
- Take out the batteries from your mouse, unplug it, and cut any USB connections that link it to your computer. After five minutes, plug everything back in and replace the batteries with new ones.
- Try connecting the mouse straight to the computer rather than through a hub to see if that fixes the problem.
- To test whether it repairs the mouse, try an alternative USB port.
You can try some more intricate fixes if none of these work.
2. Clean the Mouse
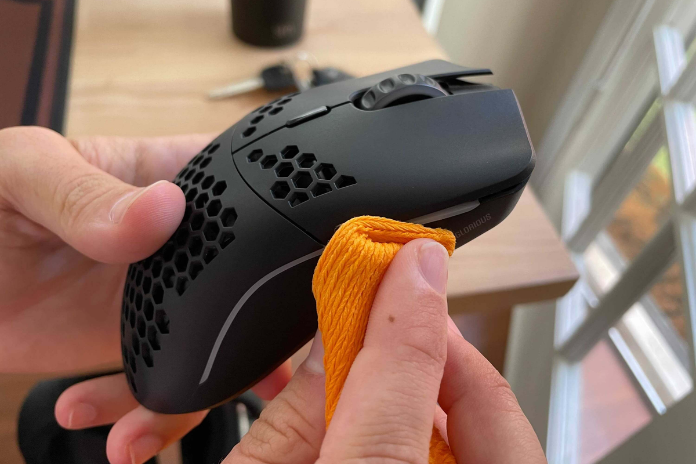
Depending on the sort of mouse you have, there are differences in how to disassemble it. There are mice with detachable bases or sides. They may have various grip configurations or button arrangements that are detachable and individually washable.
If you’re unsure of which parts of your mouse can be taken apart, see your handbook.
- Disassemble your mouse. At this point, avoid attempting to remove any screws or non-removable components. Simply take out any batteries, disconnect the mouse, and remove any parts that are supposed to be removed. Switch the mouse off if it has an on/off switch.
- Using an electronics cleaning brush, thoroughly clean the mouse’s exposed surfaces, paying special attention to the bottom. There are occasions when dirt on the bottom obstructs a seamless transfer over your mouse pad. Make sure to remove any accumulation that you observe.
- Wet a cotton swab with isopropyl alcohol that is 99 percent pure. Move it in between the mouse’s buttons. Pay attention to the spaces between the buttons. Any elevated or uneven areas on the mouse’s bottom can be navigated with it.
- After cleaning the surfaces, run the cloth over them.
- If you removed any mouse parts before beginning the cleaning, follow these steps again.
- Allow the mouse to dry for four hours. If you take extra care to prevent moisture from dripping into the mouse, you can wait less time, but it’s best to take your time and make sure it’s dry than to risk breaking your mouse.
3. Cleaning Your Mousepad
It may seem obvious to use it straight away. While the mouse is drying, you should, however, also clean or replace your mousepad.
Mouse Pad Cleaning cleaning-the-mouse-pad
Consider whether cleaning your mousepad is worth the effort before doing so. Particularly, after time, cloth mousepads get uneven and tangled. This may be influencing the mouse’s autonomous movement as well as affecting how well it works.
Make sure the surface of your hard mousepad is level and smooth. If so, use an isopropyl alcohol-dampened cloth to wipe it down. Before using the mouse on it once more, let it dry.
Make sure there is nothing underneath the mousepad as well. For optimum results, you want a level, even surface.
Read More: How Do I Create A Discord NSFW Channel? A Step By Step Guide In 2023!
4. Change Your Sensitivity
Occasionally, the sensitivity is far more than it ought to be, and even a slight push can cause the mouse to move erratically and give the impression that it is moving independently. Make sure everything is configured correctly so that the mouse functions by checking your settings.
- On the Windows key, press.
- Enter Mouse, then select Mouse Settings from the program list.
- To add more mouse options, click.
- Select the tab for Pointer Options.
- Lower the speed of the pointer. Take the Enhance Pointer Precision check off.
- Pointer options for mouse properties
- Press Apply.
- Press OK.
Take a moment to test your mouse and see if it seems to be functioning properly. You can experiment with the mouse and change the settings until you find the right ones that work for you.
In Windows and third-party programs, you can also change the DPI if your mouse isn’t moving quickly enough.
5. Troubleshoot Your Hardware
Although a mouse troubleshooter isn’t accessible, you can still locate, identify, and resolve issues with the hardware troubleshooter. Your mouse moving on its own could be the result of an unidentified issue.
- Toggle the Windows Key + X.
- Select the Windows Power Shell (Admin) option.
- Tap “Yes.”
- Without quotations, type “msdt.exe -id DeviceDiagnostic.”
- command for windows-poershell
- Type Enter.
- Choose Advanced.
- Disable Implement Repairs on its own, if preferred.
- Uncheck the box to apply repairs automatically.
- Select Next.
- As Windows looks for issues with your settings, wait.
- If wanted, select a solution to implement. It’s possible that your system has additional small issues that you’d like to address.
- Select Next.
- To resolve the problems, keep doing as instructed. If there is a repair that you do not want, make sure you read through each step to find out what it is applying.
There are situations where a remedy doesn’t even seem mouse related. For instance, there may be an issue with a USB port or a driver. Attempting to resolve these may resolve your mouse problems without explicitly identifying the mouse problem.
Read More: What Does Muting Someone On Instagram Do? Try These Quick Methods In 2023!
6. Install or Remove Drivers
Your mouse may have trouble moving if your drivers are outdated or not installed correctly. In the unlikely event that updating your drivers fixes the issue, try that first. whether that still doesn’t work, try uninstalling the driver and seeing whether a new one installs correctly.
- Hit the Windows key plus X.
- Navigate to Device Manager.
- Extend the category “Mouse and Other Pointing Devices.”
- To use your mouse, right-click on the listing.
- Choose “Update Driver.”
- update-pointing-and-mouse device
- Select Drivers via Automatic Search.
- To install your drivers, adhere to the directions.
Try erasing your mouse driver and letting Windows reinstall it if that doesn’t work. When new hardware is plugged in, it must recognize it and locate the appropriate drivers.
- In Device Manager, right-click on the mouse listing.
- To uninstall a device, click.
- remove the device
- Take out your computer’s mouse.
- Shut down the device.
- Connect the mouse.
- Await Windows identifying your mouse and installing the required drivers.
- In Device Manager, click the Action button if Windows fails to install the drivers.
- Select Scan for Hardware Modifications.
- action-check-for-hardware-modifications
- Allow Windows to locate the appropriate mouse drivers.
The maker of your mouse’s drivers may potentially be available to you. Store them onto your PC. Install them by following the same procedure as updating the driver, but instead of searching for drivers on your computer.